
When I offered to make pies for Thanksgiving, I went back and looked at my mom’s recipe, hoping it would be easy to turn vegan. But upon further inspection, not a bit of butter or dairy listed in the recipe. I was so excited – making one pie I already know how to make and one new one is much less intimidating than trying to bust out two new recipes to wow the Thanksgiving crowd. Of course when shopping I decided to throw myself a curve ball and pick up whole wheat flour instead of white – because why not make the pies as healthy as possible? This made for an interesting wrestling match between me, the dough, and the rolling pin. I eventually came up with the genius idea to roll the crust out with cling wrap over top – an invention I wish I had figured out years ago!
Unfortunately, the pies were gone so fast at Thanksgiving dinner, I didn’t get a chance to photograph the cut slices – so you’ll have to use a bit of imagination here. But trust me, it was delicious!
What you’ll need for the crust:
- 2 cups whole wheat pastry flour
- 1 teaspoon salt
- 2/3 cup plus 2 TBS shortening (Whole Foods has a good non-hydrogenated vegan shortening that works great for this)
- 7-10 TBS ice water
What you’ll need for the filling:
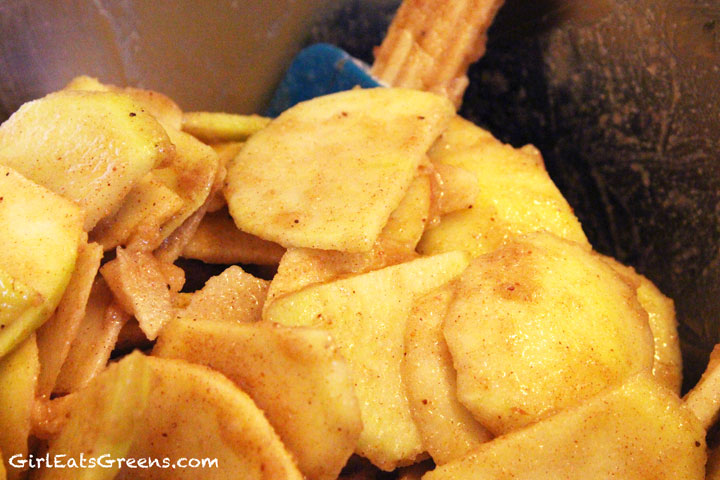
- 3/4 cup sugar
- 1/4 cup whole wheat pastry flour
- 1/2 teaspoon nutmeg
- 1/2 teaspoon cinnamon
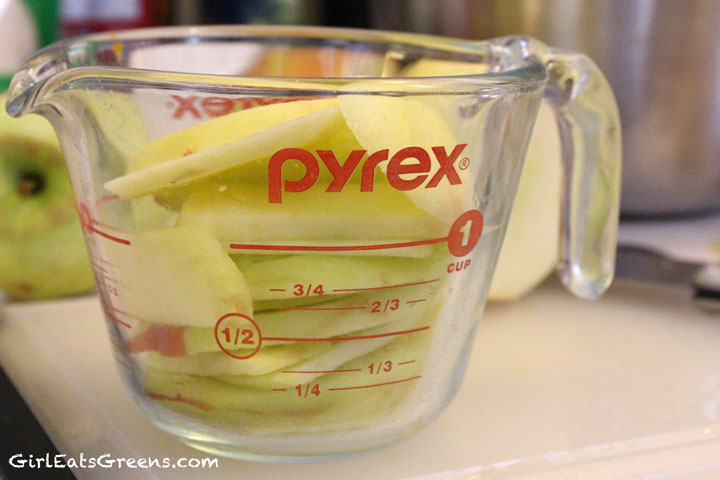
- 6 cups sliced, peeled apples (about 6 medium apples)
Preheat the oven to 425. I find it easiest to start with the crust first. Maybe not easiest per say, but a way to get the really hard part over sooner rather than later. And I must note – I was making a pumpkin and apple at the same time so I was making 1 1/2 crusts – but don’t worry the math here is right, the pictures just might look a little off.
Anyway… start by mixing the flour, shortening and salt with a fork until the flour becomes little lumpy balls. Then, start adding the water a tablespoon at a time. I found this wheat flour was way dryer than I expected, so I ended up adding more than I originally anticipated, and I could actually have added even more. Add the water until you’re able to form the dough easily into a ball. Separate the ball into two (one for the bottom crust and one for the top).


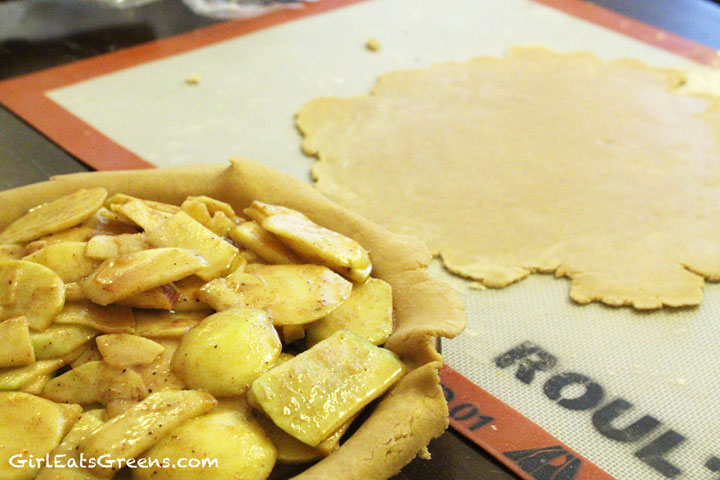
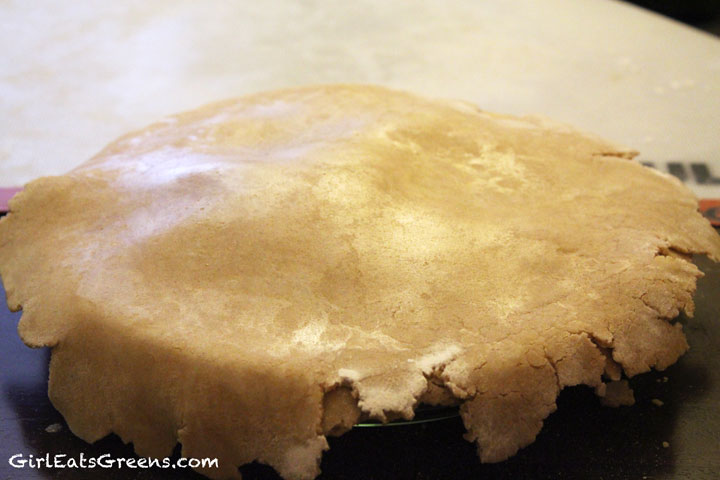
Using a pastry sheet dusted with flour and either wax or plastic wrap over the ball of crust, start rolling out the dough. This may be the best trick I’ve ever come up with. Roll it out as thinly as possible. And now for another trick – to get the crust into the plate – put the plate upside down onto the crust, then using one quick motion, flip the pastry sheet, dough, and plate right-side up. Peel the pastry sheet off the crust and it should be nice and situated into the plate! Leave all the edges hanging while you make the insides.


Mix the flour, nutmeg, cinnamon and sugar together in a large bowl. Add the sliced apples and stir until the apples are coated with the mixture. Add the apples to the pie crust and roll out the top of the crust. Place the dough on top of the apples and pinch the edges of the dough together with the bottom crust – making sure everything is well-sealed so your insides don’t bubble out while baking.


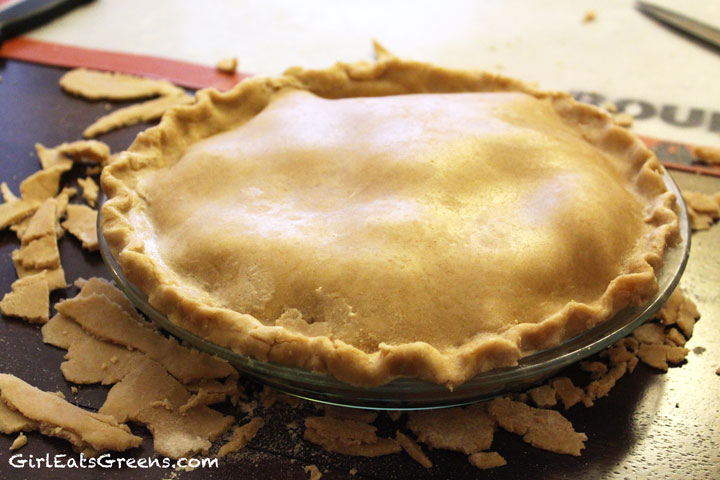
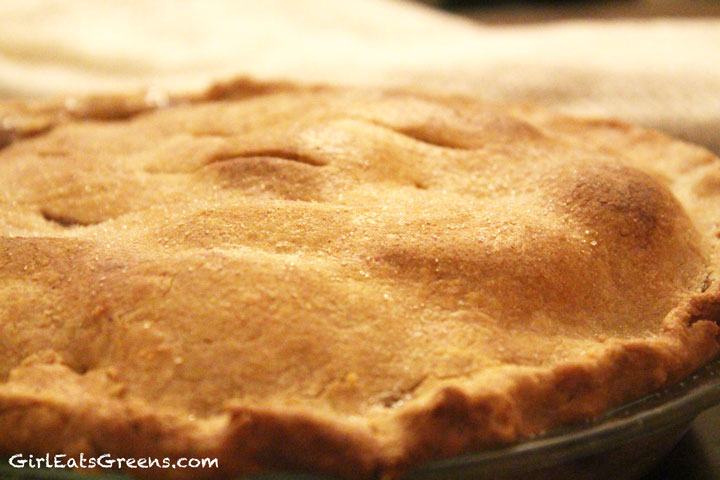
Make little slits in the top for ventilation – or if you’re creative like my mom, cut an apple shaped slice out. Place tin foil around the edges of the crust and bake for 40-50 minutes, removing the foil in the last 15 minutes. Sprinkle a little sugar on top and enjoy!


I had a little bit of a cave in on one side of the pie – but that didn’t affect the taste at all. Still went down without time to be photographed sliced!


Delicious! Can’t wait to try this recipe for our holiday dinner!
I’ve never ever made my own pie crust! Heck, even my mom never made her own pie crust. It’s something I really want to try one of these days. Maybe for Christmas. Thanks for sharing! 🙂
You should definitely try! It can be hard, but it’s so worth it in the end! And I’d love to see a blog from you on how first time crust trying goes. 🙂
Pingback: Vegan Thanksgiving: What I’m Cooking | Girl Eats Greens·